Posts Tagged ‘Well Rounded NY’

Snack Smart: Watermelon

Pregnancy Snack: Watermelon


Article and Photo courtesy of Well Rounded NY.

Petit Organics founder Michelle Marinis cools down hot mamas with 3 hydrating watermelon recipes.

Pregnant mommies in the summer are so beautiful: sandals, flowing maxi dresses and comfy bathing suits at the beach showcasing those adorable growing bellies. However, if your due date happens to fall in August, September or October you may be feeling like one (temperature) HOT mama this summer!

Keeping cool during the dog days of summer is not only more comfortable for you, but it is also critical from a health standpoint. Expecting mothers should stay thoroughly hydrated and be careful not to overheat. There are some obvious measures you can easily take in order to beat the heat — soak your feet in ice water, stay in the air conditioning whenever possible, and substitute your regular gym workout for a swim instead. But another measure that we often forget about is staying cool from the inside out. Incorporating certain foods into your diet will naturally keep you hydrated.

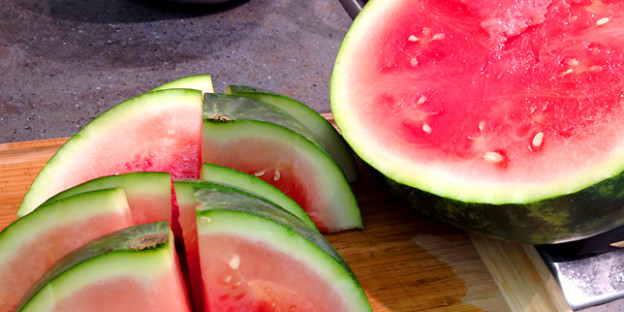
So what is this perfect food for keeping cool? I polled about 50 pregnant moms, and the number one food they crave during warm summer months is….watermelon! Watermelon is made of 99 percent water so it is a super satisfying snack for hot mamas everywhere. It is also packed with Vitamins A, B6 and C and is the fresh fruit or vegetable with the highest content of lycopene. Lycopene is a very special and powerful antioxidant that helps prevent heart disease, cancer and even sunburns. If you aren’t exactly doing back flips to dig into swiss chard, spinach or lima beans (which are all great sources of potassium), consider having watermelon instead. Potassium is critical in electrolyte maintenance for the human body, especially pregnant mothers who burn an extraordinary amount of calories each day.

Here are three watermelon recipes to keep you and your foodie-on-the-way cool and comfortable during these last few toasty summer weeks. Bon appetit to you and your bébés!

WATERMELON JUICE

Ingredients:
• 1 seedless organic watermelon (a small 5 – 6 pound watermelon works well)
• juice of 1 lime

Preparation:
1. Slice the watermelon in half and again into strips. Using a wooden spoon, scoop the flesh away from the rind and place in a blender. Discard the rind.
2. Blend the watermelon until completely pureed (approximately 1 minute).
3. Add the lime juice and blend another 5 seconds.
4. Pour into a glass and serve. Alternately, pour into a pitcher and place in fridge to chill. The juice will separate over time, so simply stir to combine prior to serving. The juice will last 3 days safely in your refrigerator.
Yields 5-6 servings.
Petit Pointer: Pour the juice into popsicle molds and voilà: watermelon ice pops!

FRESH WATERMELON & MINT SALAD

Ingredients:
· 1 medium (preferably seedless) watermelon, sliced into 1/2″ to 1″ cubes
· 8 fresh mint leaves, rolled and sliced into slivers
· 1 tbs extra-virgin olive oil
· 1 small pinch of sea salt
· 1 turn of freshly cracked black pepper
· 1/4 cup crumbled feta cheese (optional)

Preparation:
1. In a large bowl, mix the watermelon slices, mint slivers, extra-virgin olive oil, sea salt and pepper.
2. Roll in the feta cheese if desired.
3. Serve chilled or at room temperature.
Yields 4 servings.
Petit Pointer: Let the salad sit overnight so the flavors meld. It makes a perfect lunch the next day!

WATERMELON & CHIA SEED SORBET

Ingredients:
· 4 cups watermelon juice (puree a small, seedless watermelon)
· Juice of 2 limes
· 4 teaspoons chia seeds
· 8 fresh mint leaves, finely minced
· Coconut nectar (optional)

Preparation:
1. In a large jug, add the watermelon puree, chia seeds, lime juice and mint. With the lid on, shake vigorously for about 20 seconds.
2. Place in your refrigerator to allow for the chia seeds to thicken to a jelly consistency (1 hour up to overnight).
3. Pour the mixture into a freezer-safe container, close the lid and freeze for at least four hours.
4. Scoop into bowls and serve with coconut nectar drizzled on top (optional).
Yields 5 servings.
Petit Pointer: Sorbet will stay fresh in your freezer up to two weeks safely.

This article is by Michelle Marinis courtesy of Well Rounded NY. Conceived with love by former magazine editors Jessica Pallay and Kaity Velez, Well Rounded NY aims to be the singular pregnancy resource for city-savvy moms-to-be. Through reviews, profiles, expert Q&As, local guides and more, Well Rounded curates the New York City pregnancy and helps its readers come to terms – and term! – with pregnancy in the city.

Raised in Texas with a down home Southern upbringing, Michelle Muller-Marinis grew up with a passion for food and cooking. After moving to NYC and beginning a family of her own, Michelle realized the importance of fresh, healthy baby food – she discovered her little ones were always happiest with a spoonful of homemade food in their mouths! She is the founder of Petit Organics and an NYC mom of three boys, Pearce, Rylan and Brandt. You can find Michelle on Facebook, Twitter, Instagram and Petit Organics on Facebook, Twitter, Instagram, and Pinterest.

DIY: Miffy Wall Art

Article & Photo Courtesy of Well Rounded NY.

Shop Sweet Things founder Jeanne Chan dresses up our nursery walls with everyone’s favorite bunny. Hello everyone, this is Jeanne Chan from Shop Sweet Things.

I’m sure if you’re a parent, you’re familiar with Miffy (soon-to-be parents: get comfy). My girls and I love that little bunny, and so I decided to create a wall art on it. It’s super easy and it took me about 15 minutes to make!

Here’s what you’ll need:
Duct Tape
Canvas (9 x 12)
Scissors
White Poster Board

Step 1: Draw and cut out bunny ears. I made mine to be about 8 inches long.

miffy wall art 2

Step 2: Cut out color duct tape for the inside of ears and then circles for the cheeks. Cut out small circles for the eyes and two small strips for the mouth.

miffy wall art 3

Step 3: Tape the bunny ears to the back of the canvas.

Processed with VSCOcam

Step 4: Stick on the rest like the example here. It’s ok if it’s not perfect. Since it’s on canvas, you can always peel it off and rearrange. Also, I really like the rough cut of these shapes, so no worries about making perfect circles and bunny ears. I think it brings out the fun and quirkiness of this art.

miffy wall art 1

And there you have it: a cute DIY Miffy wall art for the littles. Hope you enjoy!

This article is by Jeanne Chan courtesy of Well Rounded NY. Conceived with love by former magazine editors Jessica Pallay and Kaity Velez, Well Rounded NY aims to be the singular pregnancy resource for city-savvy moms-to-be. Through reviews, profiles, expert Q&As, local guides and more, Well Rounded curates the New York City pregnancy and helps its readers come to terms – and term! – with pregnancy in the city.

New Mom Myths

New Mom Myths

Article & Photo Courtesy of Well Rounded NY.

Throughout your pregnancy, you are likely to hear friends, family and even strangers imparting their opinions and projections about your unborn child: “Get your sleep while you can!”, “You’re carrying low – you’re having a boy!” By the end of the nine months, you’re exhausted and freaked out. Once the baby arrives, this only intensifies with more people divulging more unsolicited advice. Here are some myths that you’re likely to come across as an expectant or new mom. You’ll be pleasantly surprised that they’re exactly that…myths.

Myth: “Your baby should be sleeping through the night by 3 months old.”
Myth Perpetrator: The Mom in the Park with the Good Sleeper
“Sleeping through the night” is an antiquated notion that if a parent does x, y and z, their baby will sleep the standard 6-8 hours straight at night almost immediately. A lucky few are blessed with a baby that just sleeps well, but many babies wake frequently to feed during those first few months. What determines a baby sleeping through the night is…the baby. You can do everything right, have them on an air tight schedule, observe their every feed, time every nap, sleep train, but it may not work. Even if they do sleep long stretches, this can be interrupted later on with teething, illness, growth, milestones, or changes in season. It may seem like you will never sleep again, but you will. Don’t believe the hype: you are not doing anything wrong and there is nothing wrong with your baby. Sleeping through the night is a developmental milestone that will happen when the baby is ready.

Myth: “Breastfeeding is a breeze…”
Myth Perpetrator: Attachment Mom who Doesn’t Own a Bottle
Breastfeeding might be the most natural thing in the world, but easy it is not. It takes getting used to for both mom and baby. The first six weeks are incredibly emotional, physically taxing, and at times, painful. It is not something that just magically happens on its own. Many moms need the help of lactation consultants to make it work and many quit out of frustration, but in most cases, if you can stick it out in the beginning, it becomes second nature. As baby grows, feedings become less frequent and nursing sessions are faster. Pumping allows you to leave the baby, giving you some of your freedom back. And if you find it isn’t for you, formula feeding is always an option.

Myth: “Babies need constant stimulation.”
Myth Perpetrator: The Super Mom
Babies are pretty simple creatures: they eat, they sleep, they poop. In New York City, however, there is this ideal that a baby should be constantly stimulated and entertained when they are not doing these three activities. Because there are hundreds of mommy-and-me classes starting at “0 months,” some moms feel pressured into enrolling kids in classes even before they are born! Classes are great, but they are neither a necessity for young babies, nor do they mold them into baby geniuses or line them up to go to Yale. Cuddling, playing, taking walks, and going to the park is sufficient stimulation for the first year. When babies become more mobile, can sit up, crawl, etc. then maybe it might be a good idea, but the concept that babies are molded into Van Goghs and Einsteins at 3 weeks old is a farce. It’s exciting to take your baby to their first class and it gets you out of the house, but it certainly is not a requirement in the early months.

Myth: “You can’t get anything done with a newborn!”
Myth Perpetrator: The Overwhelmed Mom
This is a big one. Yes, having a new baby is time consuming, but what babies do most is sleep! What does this mean for new moms? Some say, “Sleep when the baby sleeps.” This is a nice thought and will get you some much needed rest, but it will also leave you housebound and swamped with things to do. Try to start every day with a reasonable to-do list: whether it is running errands, taking a walk in the fresh air, or seeing a friend. Plan your tasks around baby’s naps. If you have a stroller that encourages napping by reclining, baby should be able to sleep while you do things for yourself. They can be fed and changed on the go at this age, so get out of the house!

Myth: “You’re not experiencing motherhood if you’re a full-time working mom.”
Myth Perpetrator: The Judgmental Stay-at-Home Mom
The reality is: some of us do not have the financial luxury of staying home (which, don’t get me wrong, is truly just as much of a job). If you must return to work, or choose to, that does not diminish the mother that you are, nor does it mean you are neglecting your baby. Regardless of the hours you work, the time you spend with your baby is about quality, not quantity. Make every story, bath time, and feeding special by disconnecting from your work world and reestablishing the bond with your baby. Babies instinctually know who their moms are. It takes some getting used to (and a good amount of mom guilt), but you and your baby will adjust to the time apart. Leaving is hard, but the smiles you get when you come through the door are well worth it.

I hope these myths motivate you to be the kind of mom you choose to be: the way you elect to parent your baby, feed your baby, structure his/her day – it is all up to you and no one else.

This article is by Lauren Deneroff courtesy of Well Rounded NY. Conceived with love by former magazine editors Jessica Pallay and Kaity Velez, Well Rounded NY aims to be the singular pregnancy resource for city-savvy moms-to-be. Through reviews, profiles, expert Q&As, local guides and more, Well Rounded curates the New York City pregnancy and helps its readers come to terms – and term! – with pregnancy in the city.

Together Again: Diastis Recti

tuplerhome


Article & Photo Courtesy of Well Rounded NY.

Julie Tupler can help you keep your ab muscles intact.

A woman’s body post-pregnancy can be full of surprises – hello to still looking 7 months pregnant when you leave the hospital, leaky boobs, and night sweats – but most of these surprises are the result of our bodies natural healing process as hormone levels shift, organs contract, and our focus shifts from growing a human on the inside to caring for a newborn on the outside.

However, some “surprises” linger longer than others and a diastasis recti is one such surprise. What is it, you ask? In a nutshell, the term refers to the separation of the left and right halves of your abdominal muscles. Normally these two halves are joined via connective tissue but during pregnancy, the growing uterus often weakens this connective tissue, causing your abdominal muscles to shift and the weakening of muscles that play a key role in supporting your back and your organs.

A diastasis can result in cosmetic issues like the dreaded “mummy tummy” and can also lead to back pain, pelvic weakness, and other issues which stem from a weakened core. As such, it’s something many women in New York and beyond are eager to avoid or repair, and when the time comes, Julie Tupler is usually the first person they call.

A registered nurse, certified childbirth educator and certified personal trainer, Tupler is a pioneer in the field of maternal fitness, with a special focus on the prevention and repair of diastasis recti. Her practice takes women through a comprehensive program, either in person or online, that has been proven to significantly help heal their abs.

Below, Tupler tells us more about diastasis recti, how women can care for their bodies during and after pregnancy, and how they can regain their strength in the months following their little one’s arrival.

How did you come to focus on caring for this unique aspect of women’s health?
While teaching a prenatal exercise class for pregnant women, I was surprised to learn that most childbirth classes focus on preparing a woman’s mind for labor and skip the very important task of training a woman’s body for labor, too. Labor is just like running a race –- you need to train both your mind and your body!

In 1990 I started Maternal Fitness and began working with women early in their pregnancies to train them for the “race” of labor by focusing on the proper use of their ab and pelvic floor muscles. In the process of working with pregnant women and new moms, I discovered the condition diastasis recti and I could not find anything about how to treat this condition that caused back pain, poor posture, and put women at a higher risk for a C-section. This led me to develop the Tupler Technique® for treating diastasis recti and preparing women for the marathon of labor.

How do you help clients repair a diastasis?
The goal of my work with clients is to heal the weakened connective tissue that joins your outermost abdominal muscles. As the connective tissue becomes stronger and shallower, the muscles gradually come together. A key component of my technique involves the Diastasis Rehab Splint, which is like wearing a cast when you have a broken bone -– you want to keep the connective tissue in your abs in the same position so they will heal. We also work on putting the muscles in a better position while working to strengthen the transverse abdominal muscles that are key to performing every-day movements.

What does a typical rehab/recovery process look like for women who are diagnosed with a diastasis?
Once your doctor gives you the all-clear to return to exercise, you can begin working on treating your diastasis. However, this often takes time. While a smaller diastasis can be closed in 6-8 weeks, a more serious separation may require 6-12 months of work. Know that it’s never too late to begin healing your diastasis!

How do I know if I have a diastasis?
Many women do not know they have a diastasis as abdominal separation is not something OB-GYNs routinely evaluate. If a woman has had a baby, there is a good chance she has a diastasis and that it will get worse with each baby. The symptoms can be seen easily if a woman has severe diastasis –- a protruding belly or belly button or large bulge when you get up from lying on your back –- but can also be more subtle, with obvious signs only appearing in subsequent pregnancies.

Try this easy self-test to see if you have a diastasis and note that you’re checking for the distance between your ab muscles and the condition of the connective tissue that joins them:

1. Lay on your back with your knees bent and your feet on the floor.
2. Put one hand slightly above your belly with your fingertips pointing down to the floor. If you have a protruding belly button or a bulge when you bring your head and shoulders up, you will need to use two hands to check your diastasis.
3. With your abdominal muscles relaxed, gently press your fingertips down while you lift up your head. When the muscles first start to move, evaluate how many fingers fit between the two separated muscles to determine the distance between your ab muscles. Also check how deep your fingers go, which will determine the condition of the connective tissue. The deeper your fingers go, the weaker your connective tissue. If you feel a pulsing when you check, this is also a sign of weak connective tissue.
4. Repeat step 3 two more times, with your fingers three inches above your belly button and three inches below.
5. If you have 2 fingers and the connective tissue is shallow, you likely do not have a diastasis. However, if you have room for 2+ fingers and your fingers go deep into your abdomen or you feel pulsing, you most likely have a diastasis.

This article is by Elizabeth Carr courtesy of Well Rounded NY. Conceived with love by former magazine editors Jessica Pallay and Kaity Velez, Well Rounded NY aims to be the singular pregnancy resource for city-savvy moms-to-be. Through reviews, profiles, expert Q&As, local guides and more, Well Rounded curates the New York City pregnancy and helps its readers come to terms – and term! – with pregnancy in the city.

Cravings Made Healthy: Mac & Cheese


Article & Photo Courtesy of Well Rounded NY.

Janie’s Kitchen tweaks a few ingredients to create a creamy, gooey mac-and-cheese without a Lipitor chaser.

I am the mac-and-cheese fanatic. If it’s on the menu, I always order it. If it’s not and I think its an omission, I’ll request it. I might not always finish it, but will always indulge my inner child when a fix is available. Most of us crave mac-and-cheese but don’t eat as much as we’d like due to the high fat content. The béchamel sauce, which serves as the base for real macaroni and cheese, is one of the three mother sauces of French cuisine. Also referred to as a roux, it is comprised of butter and flour, which is then cooked in whole milk (note: we haven’t even talked about the cheese yet!). We all know that butter is high in fat, and not ideal for you in large concentrations to begin with, and flour (except the whole wheat kind) is likewise not nutritionally ideal. Adding this combination an already decadent treat is pushing it, especially if you’re pregnant. So how do we make healthy macaroni and cheese and still have it taste naughty and delicious?

My solution was substituting a secret ingredient that will change your views on mac-and-cheese forever: cottage cheese. Yes, you read it correctly – cottage cheese. Low-fat cottage cheese is your saving grace, especially when pregnant. Women need to consume 75 to 100 grams of protein per day when pregnant to properly care for growing mama and baby. One serving of low fat cottage cheese has 25 grams of protein, and nearly half of the four servings of calcium recommended daily.

Seriously, one 16-oz container of low fat cottage cheese puréed in a Cuisinart until creamy will provide a delicious béchamel substitute. The mac-and-cheese recipe below is my go-to anytime I have a craving. When complete, it serves four people the way mac was meant to be enjoyed — in big spoonfuls — or seven people on a diet. One serving of my mac-and-cheese has 42 of the 75-100g of protein and 100 percent of the 1200mg of the daily calcium recommended for expecting mothers. If you use whole wheat pasta, this recipe will also provide almost 100 percent of the whole grains needed daily. Talk about a gold medal winning mac-and-cheese!

Recipe courtesy of Janie’s Kitchen.

Ingredients:

  • 1 (16oz.) Container of Low-Fat Cottage Cheese
  • 1 Cup of Grated Extra Sharp White Cheddar Cheese
  • 1 Cup of Grated Reggiano Parmesan Cheese
  • 1 Tablespoon of Apple Cider Vinegar
  • 1 teaspoon of Black Pepper
  • 1 Package of Whole Wheat Pasta
  • 1 Tablespoon of Salt (for the pasta water)

Directions:
1. Place cottage cheese in a blender or mixer and pulse until the curds turn creamy.
2. Grate the cheeses and in batches add to the cottage cheese mixture.
3. Add apple cider vinegar and black pepper.
4. Meanwhile bring a large pot of water to a boil. Once boiling add salt and follow the pasta instructions on the package.
5. Before draining the pasta save 1 cup of the starchy pasta water.
6. Drain pasta and place back in the large pot.
7. Add ½ cup of the pasta water back into the pasta and 1 large scoop of the cheese mixture and stir. Add another scoop of the cheese mixture and more pasta water if needed. The starchy water allows the pasta and cheese to melt together to create creaminess without butter or milk.
8. Stir in the last cheese mixture and place pasta in a serving bowl.
9. Optional: Add breadcrumbs on top of pasta and place in the oven on broil until the crumbs turn golden brown.
10. Serve warm.

This article is by Janie Box courtesy of Well Rounded NY. Conceived with love by former magazine editors Jessica Pallay and Kaity Velez, Well Rounded NY aims to be the singular pregnancy resource for city-savvy moms-to-be. Through reviews, profiles, expert Q&As, local guides and more, Well Rounded curates the New York City pregnancy and helps its readers come to terms – and term! – with pregnancy in the city.